
Yeah, React is fast, in many ways.
It takes much less time to develop your web apps and sites and it offers end users probably the fastest web experiences possible.
But the quickness alone will not result in the best user experience, in fact, being easy-to-navigate means nothing if the user doesn't know how to navigate your app.
So, creating an onboarding flow with a tour/walkthrough can help you quickly show the value and know-how of your website to a visitor, and can result in:
✅ A low bounce rate
✅ Higher session durations
✅ Better product adoption
✅ Increased retention
In this quick article, I'll explain what an onboarding tour created in a React app is, how it should be designed, and the React libraries that can be used to create one.
If you'd prefer to create your onboarding tour without having to mess around with code, you can also set up a UserGuiding account for free and play around with it to see if it will help you.
What is a React Onboarding Tour or a React Tour?
A React Onboarding Tour or React Tour is a guided walkthrough that guides your users through your React application with step-by-step tours, onscreen modals, or tooltips (Learn more about React tooltip). These elements usually exist on top of your website and are displayed to all new users during their first visit.
React Tour can be in the form of introductory onboarding screens with single or multiple steps, explaining the tool.
Or,
React Tour can be in the form of a visual walkthrough of the main components of your UI.
Or, it can be more advanced than that and in the form of an assisted task, like most video games have adopted.
Regardless of the form, a react onboarding tour should show users how to achieve value as soon as possible.
Speaking of value:
Find the Aha Moment First 💡
If you're going to create a react tour for your app's onboarding, might as well do it the right way.
What most people do wrong when creating product tours is not even glancing at the users' needs and journeys. The product tour you're going to create is going to be for your users, not you.
So, it makes sense to answer their questions and help them understand how to get value from your product, instead of educating them about every component of your app.
Helping them get to their aha moment - the moment they truly understand how your product can help them - should be the priority.
This can be done in 3 simple steps:
- First, map out the user journey, look at every step and action your visitors and users are taking in your app to create patterns.
- Second, find the pattern the most successful/engaged users commonly take, map it out visually. Compare it to the patterns of users who churned/quit to find the differences. (the Aha moment presents itself in this part.)
- And third, design your onboarding carefully so it pushes your new users through the pattern of successful users all the way to their Aha moment.
For example, if most of your engaged users viewed your product's settings page during their first time and churned users didn't, that's probably one of your aha moments. Make sure your product tour takes them to the setting page.
5 React Onboarding Libraries to Use
One of the key upsides of using React Native or Reactjs to develop your web apps is that you have access to an ocean of libraries and plugins.
And these React Native/Reactjs libraries and plugins don't disappoint when it comes to creating a react tour.
Here are the best react tour libraries and plugins you can get your hands on:
1- React Joyride
React Joyride provides you with the best react tours you can find in an open-source library.
With over 4.3k stars on GitHub, React Joyride is a widely used plugin that can help you create UI tours for new users and can also be used to create in-app elements to introduce new features to existing users.
Since its first version in 2016, there have been almost 500 issues opened on GitHub under React Joyride, and 481 of them are closed at the moment; so it's safe to say you'll get the support you need.
Here's what the end-product looks like:

Why React Joyride?
▶ Amazing base design
▶ Easy to use
▶ Highly customizable
▶ Active and attentive devs
▶ Plenty of documentation
React Joyride Setup
(From the installation guidelines on React Joyride's website)
Setup
npm i react-joyride
Getting Started
import Joyride from 'react-joyride';

export class App extends React.Component {
  state = {
    steps: [
      {
        target: '.my-first-step',
        content: 'This is my awesome feature!',
      },
      {
        target: '.my-other-step',
        content: 'This another awesome feature!',
      },
      ...
    ]
  };

  render () {
    const { steps } = this.state;

    return (
      <div className="app">
        <Joyride
          steps={steps}
          ...
        />
        ...
      </div>
    );
  }
}
2- React Shepherd
React Shepherd is a React Native wrapper for Shepherd.js, the popular open-source library for simple product tours.
React Shepherd has over 260+ stars while the Shepherd itself has almost 10K stars. They use Popper.js to render overlay dialogs which makes Shepherd's onboarding elements as responsive as they can be.
The two biggest upsides of Shepherd are the attentiveness of the maintainers and the simple and classy base design it has.
Here's what Shepherd's tours look like in action:

You can find React Shepherd's GitHub repository here.
Why React Shepherd?
▶ Attentive maintainers
▶ Classy and decent base design
▶ Highly customizable
▶ Easy to setup
▶ Plenty of documentation
React Shepherd Setup
(From the installation guidelines on the GitHub page)
Install
npm install --save react-shepherd
Usage
import React, { Component, useContext } from 'react'
import { ShepherdTour, ShepherdTourContext } from 'react-shepherd'
import newSteps from './steps'

const tourOptions = {
  defaultStepOptions: {
    cancelIcon: {
      enabled: true
    }
  },
  useModalOverlay: true
};

function Button() {
  const tour = useContext(ShepherdTourContext);

  return (
    <button className="button dark" onClick={tour.start}>
      Start Tour
    </button>
  );
}

class App extends Component {
  render() {
    return (
      <div>
        <ShepherdTour steps={newSteps} tourOptions={tourOptions}>
          <Button />
        </ShepherdTour>
      </div>
    );
  }
}
3- Intro.js React
Intro.js is the biggest JavaScript library for web onboarding content (21K stars and 2.6K forks), and its React wrapper, Intro.js React, is out there for the interested.
With Intro.js, you can both create simple product tours and in-app hints/Angular tooltips easily, which is a great advantage over other libraries on the list. It is also pretty customizable and lightweight, so you can make it get into any shape you want.,
The only downside is probably the fact that Intro.js is not free unless you're using it for non-commercial purposes. You need to purchase a lifetime license if you are going to use the library on your commercial website, app, or plugin.
Intro.js React has over 240 stars on GitHub and 60+ issues (53 closed). The installation of Intro.js on React apps can be kind of tricky, but it'll surely work as long as you carefully set it up.
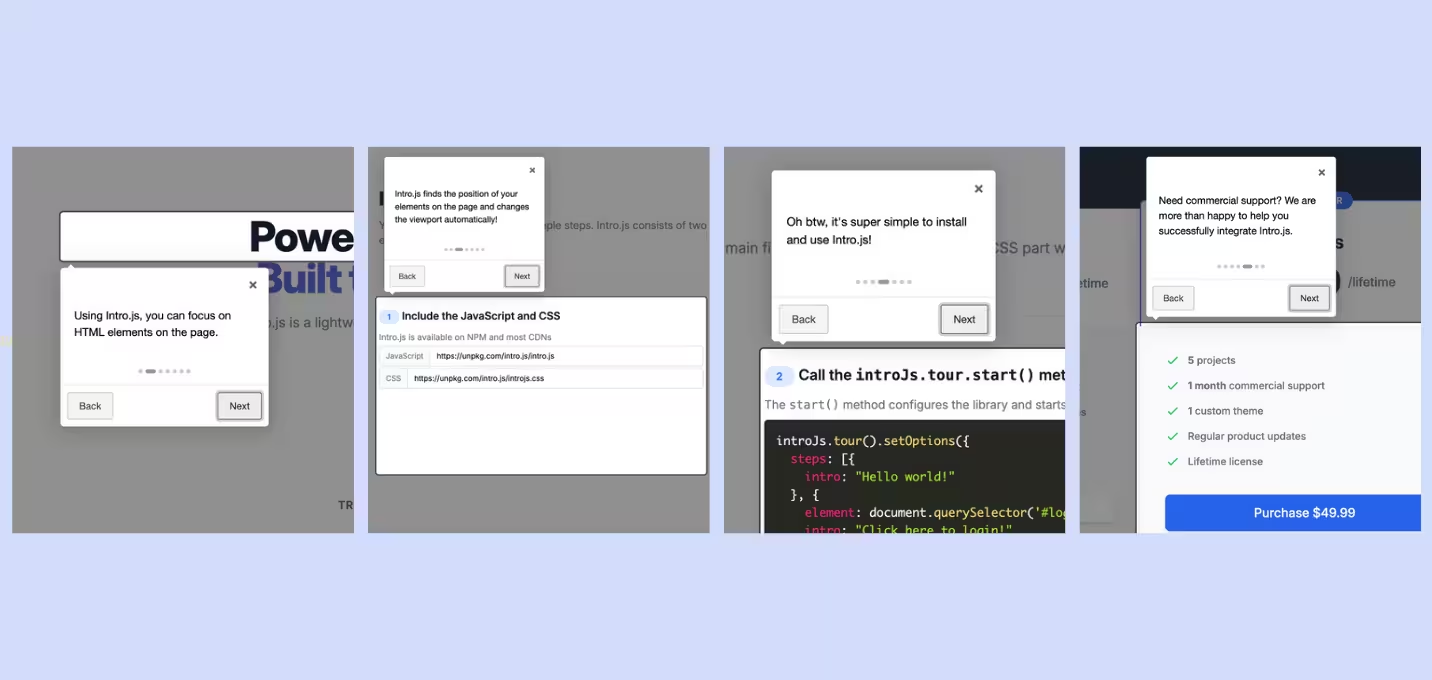
Here's what the product tours you create with Intro.js will look like:

And here's what the hints/hotspots you create with Intro.js will look like:

You can find Intro.js React's GitHub repository here.
Why Intro.js React?
▶ Attentive devs
▶ Paid options for getting official support
▶ Easy to use and setup
▶ Heavily customizable
Intro.js React Setup
(From the installation guidelines on Intro.js' Website)
First, Install Intro.js using NPM
npm install intro.js --saveInstall Intro.js React
npm install intro.js-react
Then, Add Intro.js and its CSS Definitions to the page:
import 'intro.js/introjs.css';
Now, Import the Components:
import { Steps, Hints } from 'intro.js-react';For the next steps on using Intro.js React or Intro.js, visit their GitHub repositories.
4- walktour
walktour is not the most backed library for React tours, but it has a lot of promise.
With walktour, you can create guided tours with steps that can work in other ways than just the ones in traditional onboarding screens. Plus, the devs have put all the information you need to create and customize your React tours on the repository, so you can install and get started right away.
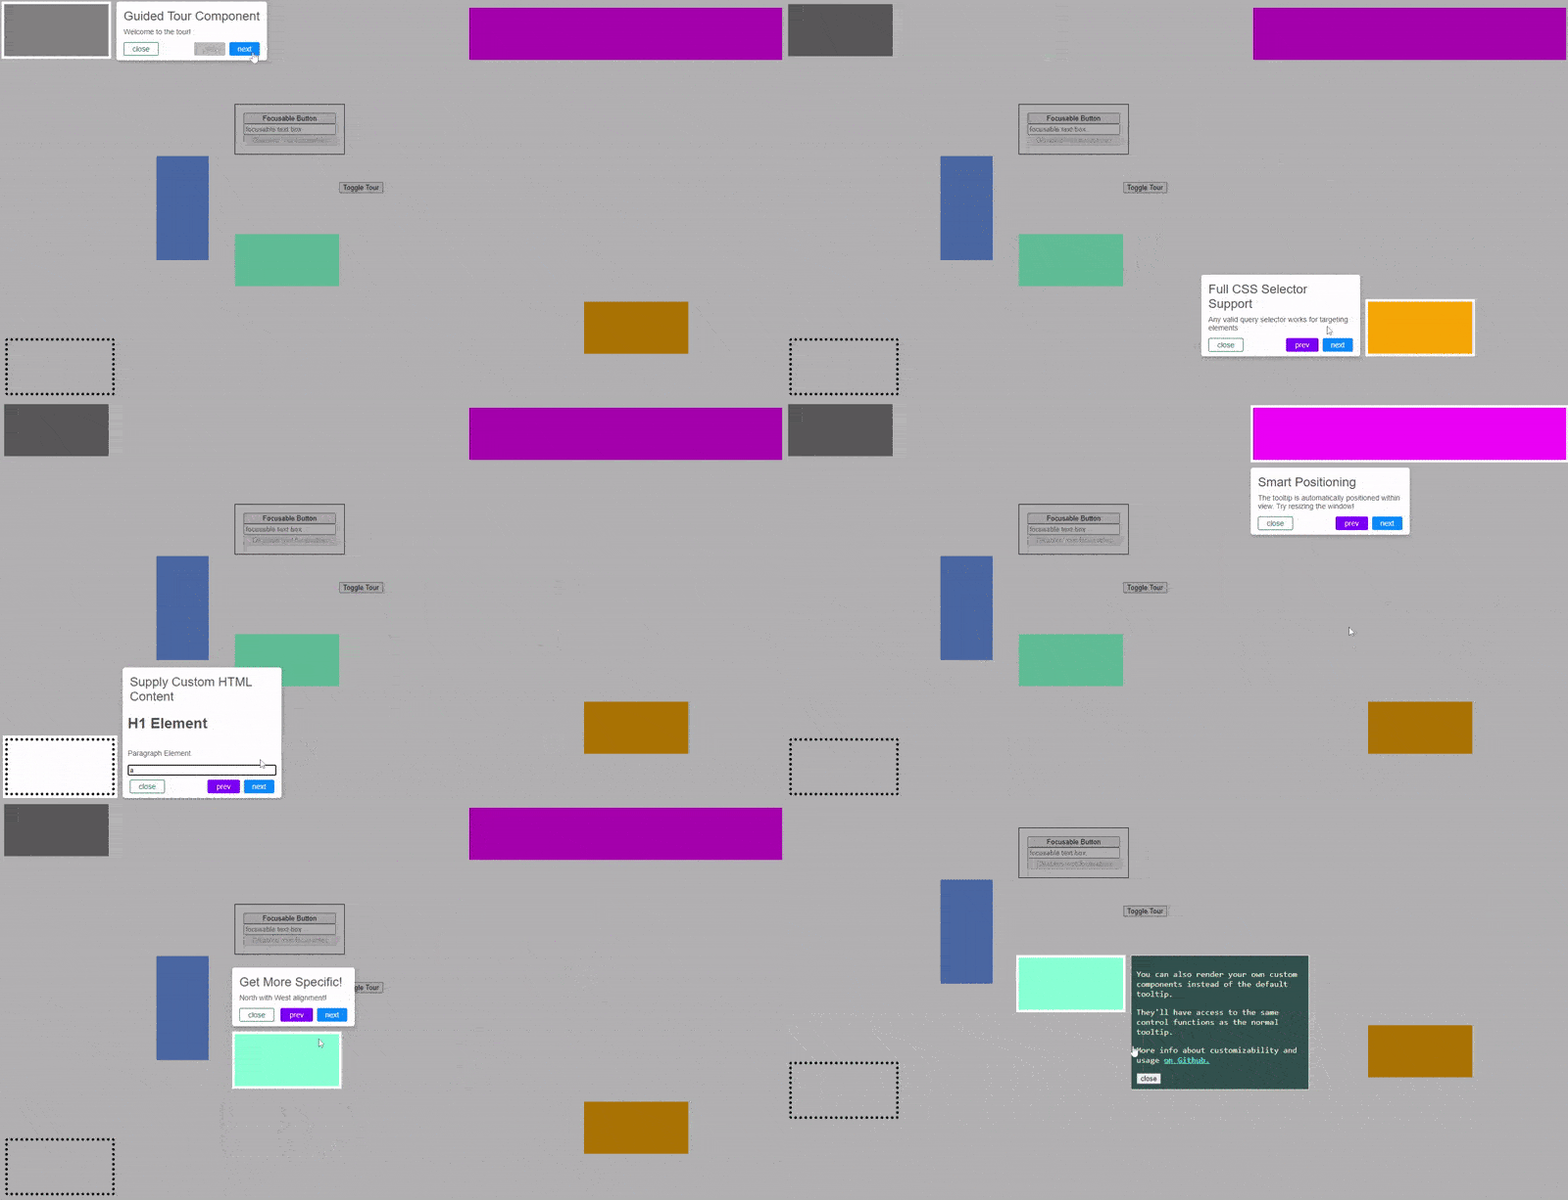
It was the demo of walktour that got me to put it in this list, as the devs have explained the value of the library in a simple yet effective way. Here's the screen recording of the demo:

Why walktour?
▶ Advanced tours and steps
▶ In-depth setup documentation
▶ Heavily customizable
walktour Setup
(From the installation guidelines on walktour Repository)
Installation
npm i walktour
import { Walktour } from 'walktour'
Getting Started
<Walktour
   steps={mySteps}
/>
Check out walktour's GitHub Repository for advanced guidelines.
5- Reactour
Reactour is another popular library for creating React app tours. With 2.8K stars on GitHub and more than 40K downloads weekly, it offers a simple way to walk users through your websites and apps.
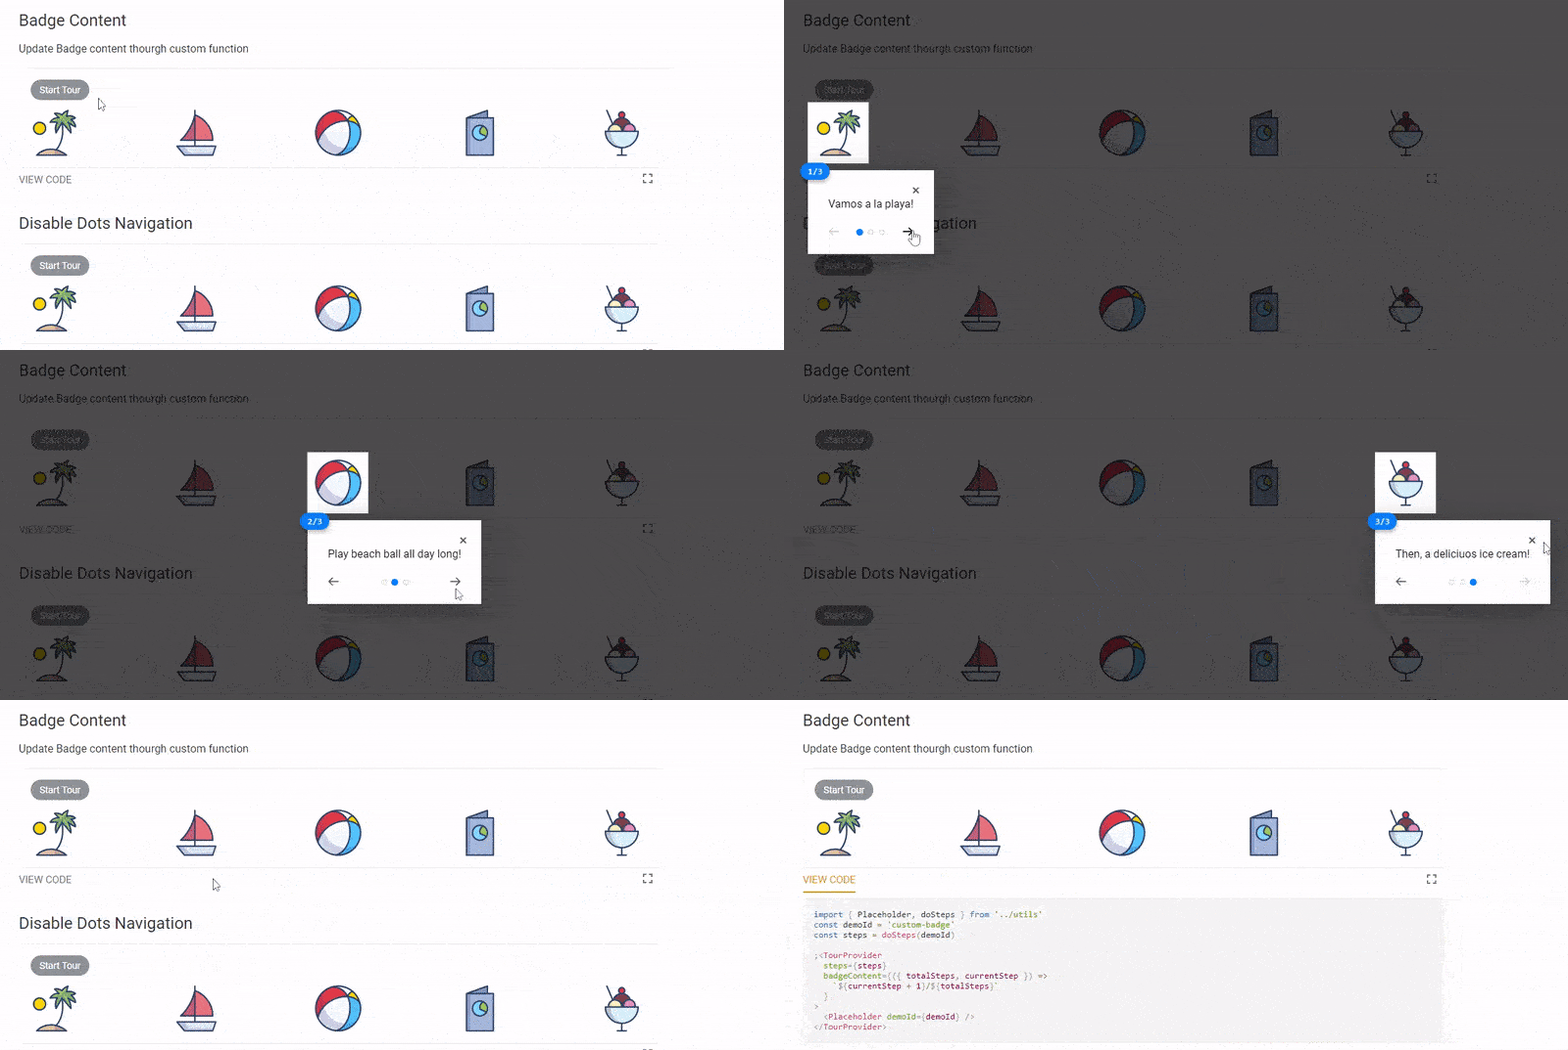
The best part of Reactour is that it has a great playground page that allows you to see how different combinations and variations play out and the code of everything.
Here's an example:

Setting up Reactour might be more difficult than the other libraries on this list, but if it suits your needs, it can be worth it.
Why Reactour?
▶ Great documentation and helpful content
▶ Attentive devs
▶ Simple base design and high customizability
Reactour Setup
(From the installation guidelines on Reactour's GitHub Repository)
Installation
npm i -S @reactour/tour @emotion/reactAdd the TourProvier at the roof of your page, passing the steps ofthe elements to highlight during the tour.
// ...
import { TourProvider } from '@reactour/tour'

ReactDOM.render(
  <TourProvider steps={steps}>
    <App />
  </TourProvider>,
  document.getElementById('root')
)

const steps = [
  {
    selector: '.first-step',
    content: 'This is my first Step',
  },
  // ...
]
Then control the Tour using usetour hook.
import { useTour } from '@reactour/tour'

function App() {
  const { setIsOpen } = useTour()
  return (
    <>
      <p className="first-step">
        Lorem ipsum dolor sit amet, consectetur adipiscing elit. Praesent at
        finibus nulla, quis varius justo. Vestibulum lorem lorem, viverra porta
        metus nec, porta luctus orci
      </p>
      <button onClick={() => setIsOpen(true)}>Open Tour</button>
    </>
  )
}
Check out Reactour's GitHub Repository for more information and guidelines.
Select based on your needs
The library that will work the best for your React app totally depends on your needs. Have a look at each of these libraries in turn, and start trying them out with the one that seems like the best fit.
If you don't have the time to code your product tour yourself, even from a library, consider checking out UserGuiding. UserGuiding will let you build all your onboarding elements in your product tour – without having to use any code at all.
You can sign up for UserGuiding and play around with it for free, so what are you waiting for?
Frequently Asked Questions
How do you use React tour?
After selecting which library/plugin you will go with, you need to install it and follow the steps provided by the maintainers and developers to use React tours. Usually, creating and using React tours are pretty simple, and you can implement these libraries to your web app in a matter of hours.
What are the best React Onboarding Tour libraries?
The best onboarding tour libraries for React apps are; React Joyride, React Shepherd, Intro.js React, walktour, and Reactour.
Is an open-source library the best way to onboard users in React?
An open-source library can be your quick path to creating a product tour, but no open-source library usually has all the elements and features you need to create a complete onboarding experience that boosts conversions. With a user onboarding software like UserGuiding, you can create all these elements by simply dragging and dropping, without any coding.
What is the best alternative to React tours?
A React tour is a decent choice to onboard users if you have plenty of developer time and no budget; but with a minimal budget and no coding, you can use a 3rd party user onboarding software like UserGuiding to onboard users with plenty of different and engaging elements.
What is React Tour?
React Tour is an onboarding solution designed to enhance user experience in modern web applications. By leveraging the React JavaScript library, React Tour helps with the process of creating interactive and engaging step-by-step guides for new users.


.svg)
.svg)
.svg)
.svg)
.svg)


.svg)
.svg)


.png)


